Introducing the inserter plugin
17 February 2018
Last week I released a new plugin on wordpress.org called Inserter. The name seemed appropriate, and you’ll realize why as I explain below what it does.
Short explanation: Inserter allows you to write custom HTML & JS in your dashboard, and then replace the contents of any element in your screen (or prepend/append your content to it in v1.1).
The technical explanation: Inserter has a custom post-type where you can write a custom template-part using underscore.js. If you’ve worked with the customizer and creating custom controls for it, you’re probably already familiar with the underscore.js syntax. :)
You can feed the global $post to your custom template, use a custom JSON array of data, or even use the REST API from WordPress and template is then rendered on your site.
Now, it may sound pretty simple, but you can actually do lots of cool things using it!
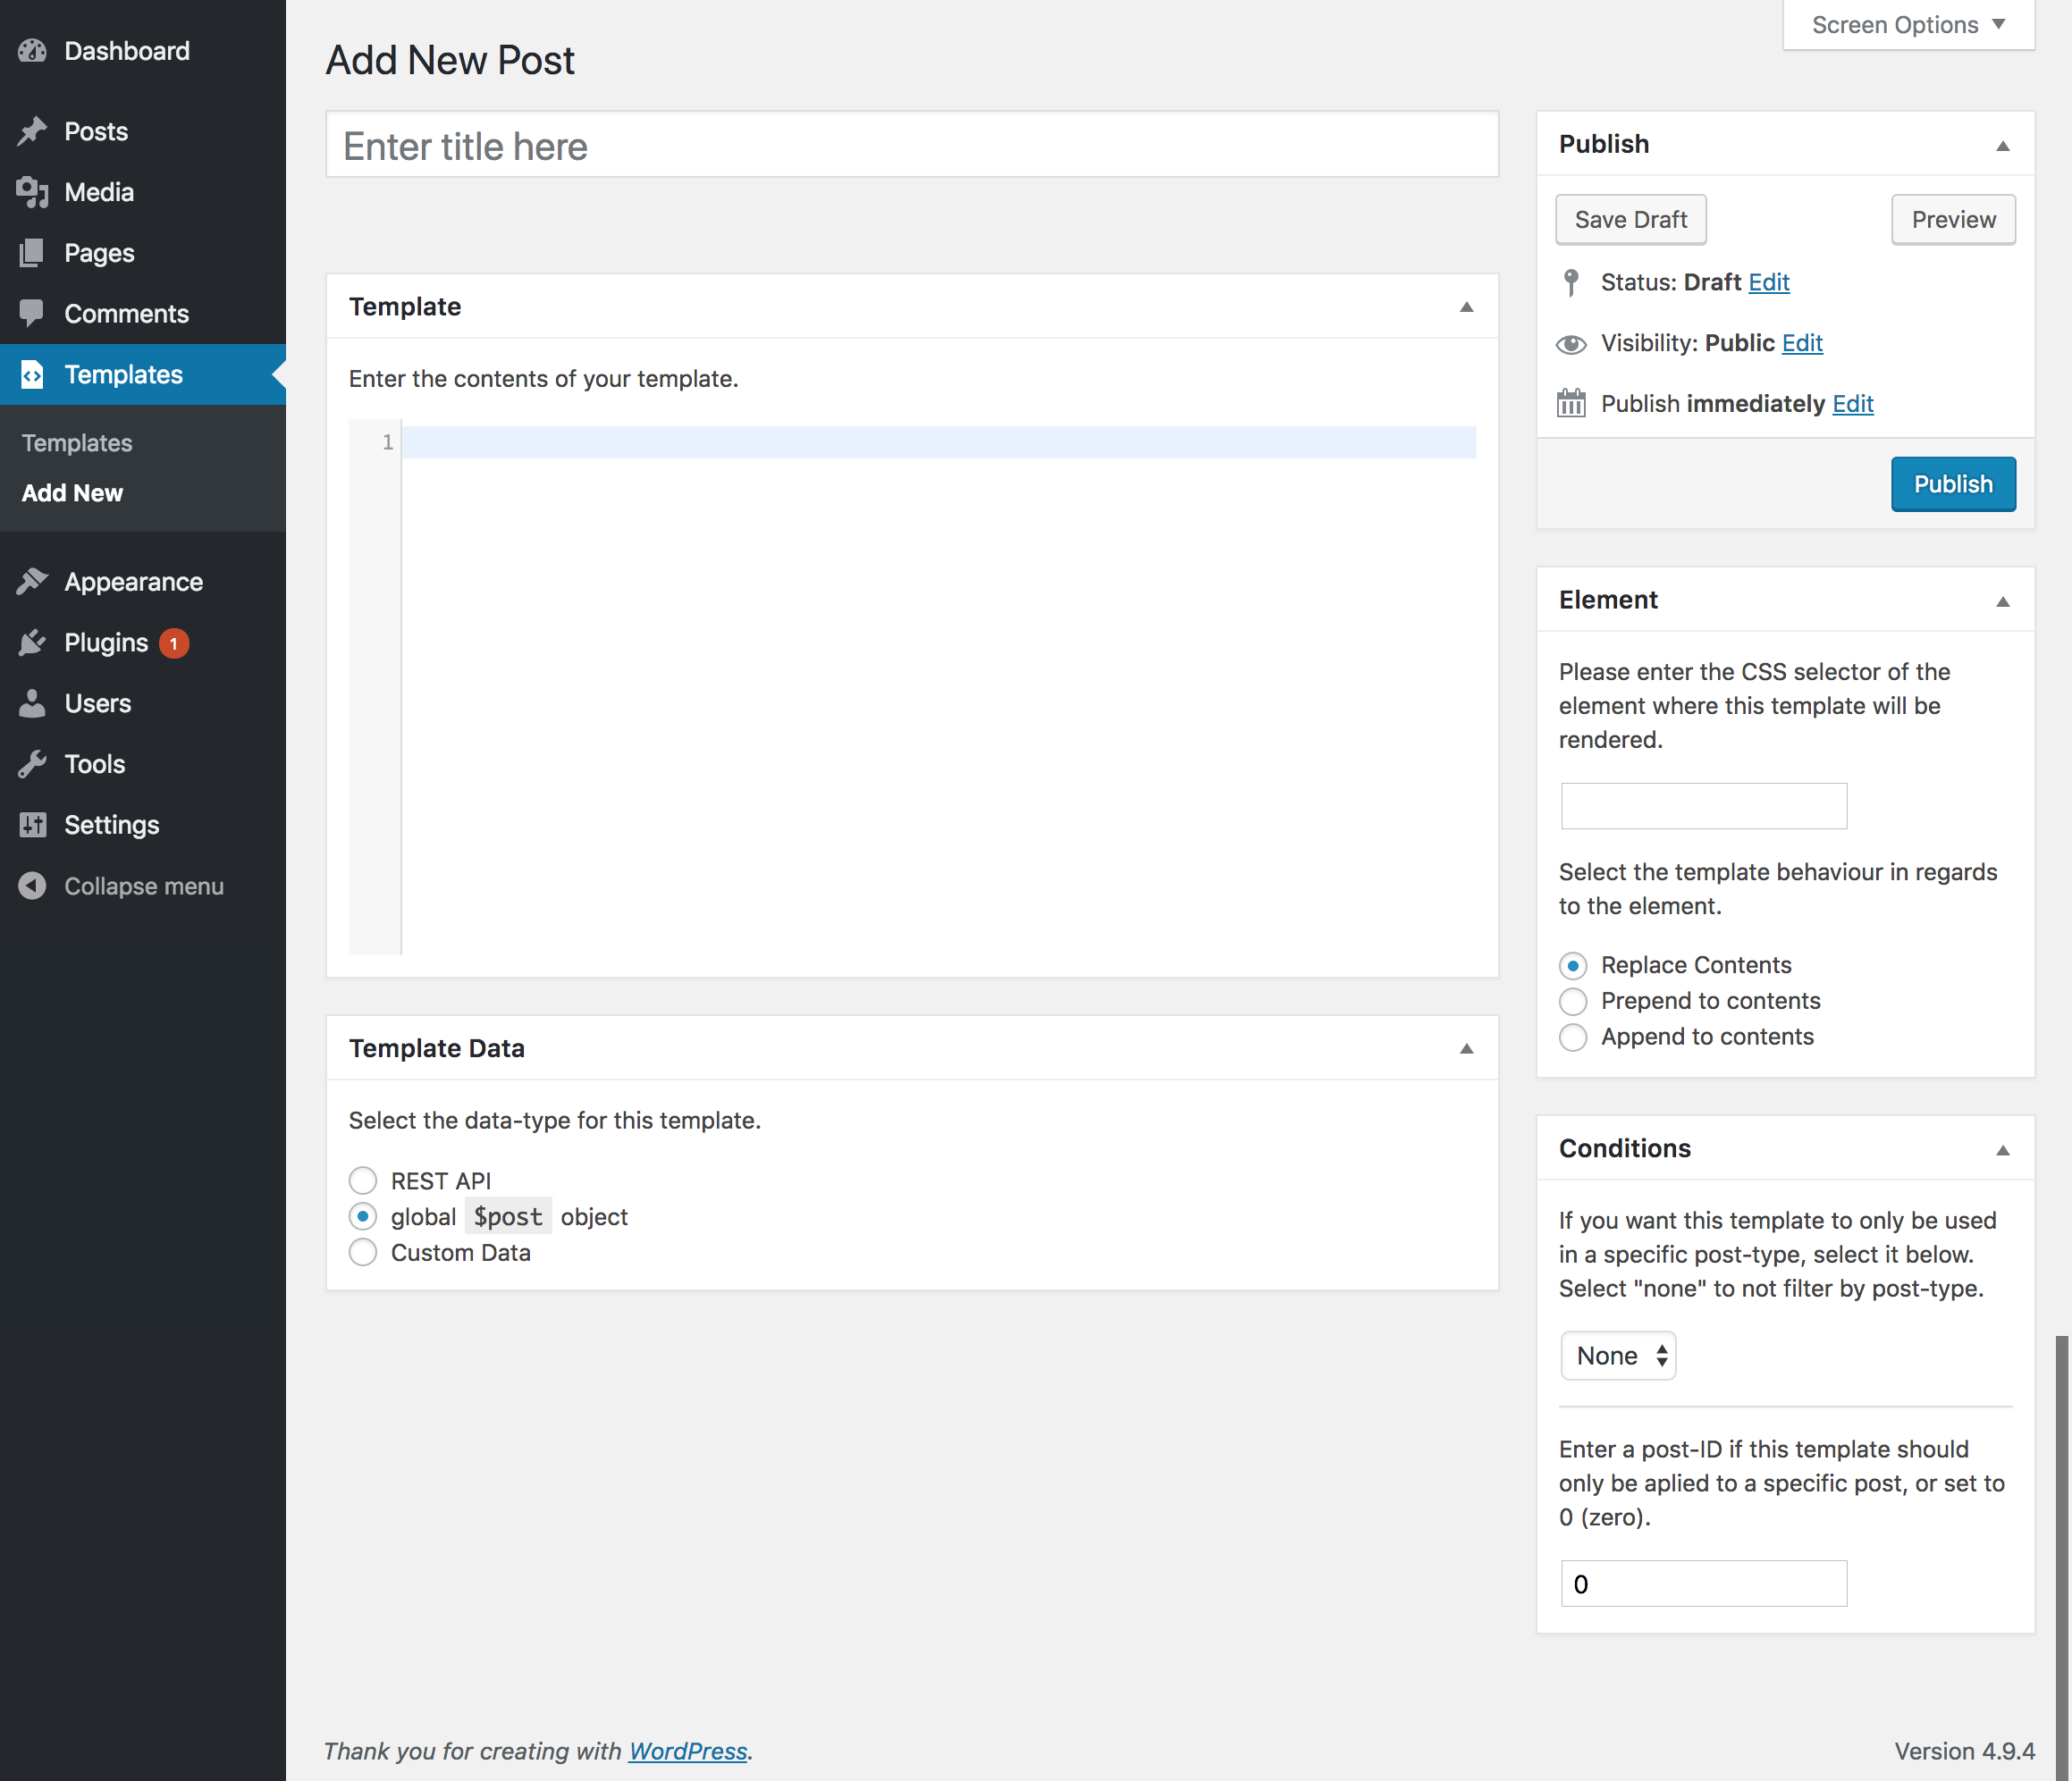
The admin screen is pretty simple and looks like this:

Let’s see some examples, I think it’s easier to understand what you can do if you see it in action.
Example 1: Insert an icon before all post-titles.
Let’s assume that post-titles on your site look like this:
<h1 class="entry-title">Hello world!</h1>
and you just want to prepend a dashicon.
What you would do is this:
- Create a new template
- Use whatever title helps you identify it when you see it in the list of templates on your dashboard.
- In the “Template” post-meta field, you’d add the HTML you want to add. In our case we’ll add this:
<span class="dashicons dashicons-carrot"></span> - In the “Template Data” post-meta field, you can select “custom” and just enter {} in the box below since it asks for a JSON-formatted object/array.
- In the “Element” post-meta field, you’d enter
h1.entry-titleand in the radio input below that, select “prepend”.
Save the post post, and that’s all. Once you go to the frontend inside a post, you should see the carrot dashicon right before the post-title

Obviously the above example isn’t very useful, and it just shows you what the fields do. So let’s move on to something better.
Example 2: Adding featured images to post-archives asyncronously.
That’s right, you can do that without ever touching your theme’s templates. Here’s how:
First of all, create a new template from the plugin’s screens, and add this inside it:
<# console.log( data ); #>
Select the REST API as your template’s data-source, and then visit a post that has a featured image. Open your browser’s console, and look at that… All the post’s data is now available in javascript - including the featured image.
If you now look at data.featured_media.description.rendered, you’ll see it contains the full markup for a featured image with responsive sizes and so on. If you want you can just use that, but for this example I’m going to use data.featured_media.guid.rendered which contains just the URL, and data.featured_media.alt_text which is the image’s alt text.
For this simple example I’ll just use the URL and alt of the image. Of course you can use whatever you want… there’s a separate URL, alt and everything you could possibly want in that object, so just pick what you like and use it.
Back on my template, now that I know where the data I want to inject lies I can replace the <# console.log( data ); #> that I previously added with something that will actually do something:
<# if ( data.featured_media.guid ) { #>
	<img src="{{ data.featured_media.guid.rendered }}" alt="{{ data.featured_media.alt_text }}">
<# } #>
If you’re wondering about the use of <# #>, {{ }}, or {{{ }}}, this is what they do in short:
<# #>Evaluates. You can basically wrap any valid JS inside the<#and#>tags. Think of it like adding<script></script>in your template.{{ }}Interpolates the contents inside it, printing escaped value.{{{ }}}Same as{{ }}but does not escape anything.
You can read more about template interpolation in undersore.js templates and WordPress in the WordPress Codex.
You may be wondering about the <# if ( data.featured_media.guid ) { #> condition in the above example… here’s what happens: By default when Inserter uses WordPress’s backbone.js client to get a post using the REST API, data.featured_media is an integer containing just the attachment-ID of the post’s featured image.
In order to get around that and provide all of the data we’ll need, inserter makes a 2nd request internally using post.getFeaturedMedia() to get the featured-image model, and we replace the post’s featured_media with the model’s attributes to make using images easier. And if you look at the plugin code you’ll notice we do the same for authors to provide all the user’s public data using post.getAuthorUser()!
Ideas
We saw above some basic examples on how to use the plugin, so here are some more ideas about what you can do:
You could create a custom theme that contains nothing but skeleton templates for posts and then using the REST-API inject the post-content as the page loads.
If you’re unfamiliar with the term “skeleton template”, you’ve probably seen them in facebook, linked-in and other apps that load content asyncronously. They look something like this:
 A skeleton template is a placeholder for the actual content. So you can just have a placeholder for the content, another for the post-media, another one for the post-meta and author details, and then fill-in those details in the page as it loads!
The future
Right now the inserter plugin only supports single posts, though you can use use the global $post data to get info on archives and do simple replacements using that. Support for post-collections however is planned and will be available in a future version.
If you want to help out with the plugin development you can visit the repository on github. Comments, pull-requests etc are more than welcomed. :)